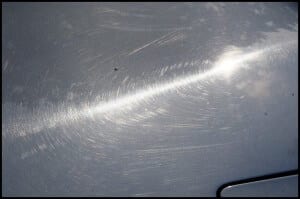
Learn how to prevent swirl marks with our Top 10 Tips How To Prevent Swirl Marks!
Swirls marks are simply very fine scratches which dull the paint and create an eye-sore to any enthusiast when the sun pops out!
So skim through and learn how to prevent swirl marks with the pros!
Tip 1 – Use Lubricant..
The main cause of paint damage is obviously making contact with it, if you left your car in a glass box since it was new your paint would obviously be immaculate (although considering the condition cars come out of the factory these days, even that is unlikely).
Since this is not possible for anyone who wishes to actually use their car as a car, the key point is to make it harder to scratch by providing great lubrication while making contact. Use a great quick detailer to dry, remove marks, remove wax, touch ups and..quick detailing..!
Tip 2 – Don’t Touch!
Unlike our skin, paint cannot re-heal itself (yet..it’s coming soon!), so if you wish to prevent swirl marks don’t be tempted to touch or rub the paint with your bare hand, no matter how shiny and appealing it looks!. Even soft skin can mar and scratch paint so use a microfibre with every contact you make with the paint.
Tip 3 – Use Clean Tools
Using cheap sponges & dirty water is one thing (more on this later) but any wash tool, product or bucket WILL cause damage if its dirty regardless of how careful you are or the wonderful claims the product carries.
Clean your wash mitt out after every wash and wash all the cloths you use to ensure you minimise the chances of scratching!
Water is one of the cheapest cleaners you can use so make sure you use plenty of it and wash your products before & after use, this alone could save you hours of polishing.
Tip 4 – Add A Pre Wash Snow Foam
This is probably the biggest cause of swirl marks being inflicted. Taking a sponge or wash mitt, straight to a dry, dusty, dirty vehicle. Dragging any dirt across the surface of your paint is a guaranteed way to inflict micro scratches.
As mentioned above, water is one of the cheapest cleaners you can buy so make use of it and rinse your vehicle thoroughly, removing as much dirt as possible before the first contact is made to your paint.
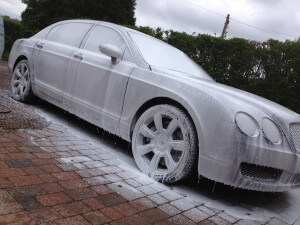
You can add an extra layer of swirl-security (and fun!) with a pre-wash treatment. This is where the use of Snow Foam pre-wash cleaners are a very valuable tool. A thick layer of snow foam left to dwell, soften surface dirt and rinsed off before hand washing will make a big difference in the quality of your car wash.
NB: you will need a pressure washer and a snow foam lance for the best shaving foam effect!
Tip 5 – Throw Away Your Sponge!
Yes especially the infamous ’99p jumbo sponge’! Despite them being available in every shop, it is one of the easiest ways to damage your paint. This is due to the type of material they are made from, typically foamed plastic polymers, and their large flat surface.
The best alternative is a quality wash mitt which can either be a lambswool wash mitt for the ultimate luxury clean or a microfibre wash mitt for improved cleaning and easier maintenance.
The flat surface of the sponge provides nowhere for any small bits of dirt or dirt to go, making them create their own space, which in this case is a small scratch in your paintwork as your wash your car.
By simply swapping to a deep-pile wash medium, such as genuine lambs wool, your paint will be saved from thousands of tiny scratches, meaning better looking paintwork & less hours polishing!
Tip 6 – Upgrade Your Shampoo!
As well as the product used for washing your vehicle, using a quality shampoo used with it can make a big difference in terms of protection & swirl-mark prevention.
The best shampoo to look for is one with good lubrication, ph neutral so it doesn’t strip your wax/sealant/protection and which easily rinses or free-rinses. (free-rinsing doesn’t mean no rinsing!).
It may seem expensive buying a quality shampoo but the large container size and far higher dilution rates make it much cheaper in the long run, plus help avoid swirl marks which saves hours of polishing!
Tip 7 – Avoid Cross-Contamination
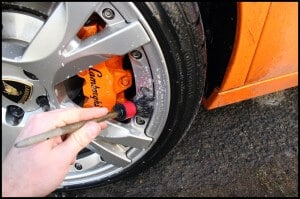
If you don’t already wash your wheels, arches & shuts before the paintwork, try cleaning these areas first to prevent making the car dirty again after you have washed it.
However, if you prefer washing the wheels after the bodywork then make sure you don’t use the same mitt you wash the paint with as you do on the wheels.
The main reason is to avoid picking up iron filings/metallic particles from the wheels then dragging the sharp debris across the paint causing all kinds of damage.
If you do prefer to wash the wheels after the body, just make sure you keep the wash tools separated and always use a proper wheel brush that is only used for the wheels.
Tip 8 – Upgrade Your Buckets!
Check Out The Full Specs Of These Swirl-Free Buckets..
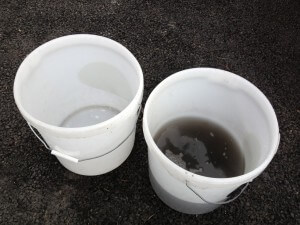
There is much evidence and reason behind using multiple buckets for washing your vehicle and comes back to tip 6, avoiding cross-contamination & tip 2, keeping it clean. The idea here is to use 1 bucket for your shampoo solution (wash) and 1 full of fresh plain water (rinse) preferably with grit-guards to further promote this two-bucket method.
Simply wash a panel with the shampoo solution then before washing the next panel, dip the mitt in the rinse bucket, scrub it by hand to remove any dirt then dip it back in the shampoo from the wash bucket and continuing with the wash. This ensures that any dirt removed from the paint is also removed from the wash mitt and isn’t dragged across the car during washing, further preventing the likelihood of damage.
You can also further improve this by using another bucket (or two..) for the wheels & arches, just make sure you get some which can stack!
Tip 9 – Throw Away The Chamois
Use a plush microfibre towel instead of a chamois will save lots of swirl marks!
This comes back to the same reason as not using a sponge due to the flat surface that a chamois provides, there is no escape for grit and any bits of dirt missed in the washed will be dragged across the surface and give you plenty to polish out later.
Instead, use a large microfibre drying towel as its not only softer than cotton but also absorbs a lot more water than a chamois usually enabling a whole car to be dried without a single wring out of excess water.
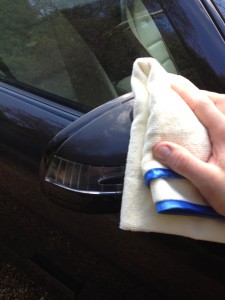
Tip 10 – Pat Dry
Now that your microfibre drying towel has replaced your chamois, you can further minimise the chance of paint damage by patting dry the remaining water that is left on your car after the final rinse and you have sheeted off as much water as possible.
The microfibre’s construction enables it to ‘pull’ water into itself enabling you to simply move near the water drops to easily soak up remaining water with ease.
Help – My Car Is Already Covered In Swirls!
If your car is already suffering from swirl marks you will need to use a quality polish to remove them. This can be done by hand or machine for better and quicker results.
Unless you use an all-in-one polish to reduce the swirl marks then you will need a wax to protect the surface but this also helps smooth the finish and further reduce the appearance of swirl marks.
It is also worth keeping your car well waxed or sealed as this will act as a barrier between you and the paint and further reduce the chance of putting light scratches and swirl marks into the paint.
Share With Others Who Suffer From Swirls!!
If you enjoyed this post or found it useful please share on Facebook or Twitter, thank you!


