 Cleaning your car after detailing will be quick and effective using our tips for supplies and procedures.
Rather than risk ruining the beautifully fresh, glossy, shiny paintwork by cleaning your car incorrectly, there are some simple steps you should take to restore the shine it had just after it was detailed.
How To Clean Your Car After Detailing
The tools you should be using to clean your car after a detail are going to make the biggest difference, not only will they make your cleaning easier but also avoid the dreaded swirl marks.
The best products to use to clean your car after detailing are:
- Two Buckets with Grit Guards
- One Bucket just for wheels
- Wash mitt for wheels
- Wash mitt for bodywork
- Neutral Shampoo
- Microfibre Drying Towel
- Quick Detailer
- Tyre Protectant
- Pressure Washer or Powerful Hose
- Buffing Towels For Detailing
Or try the Gtechniq Maintenance Kit For Everything You Need In One Bag! (Except Buckets!)
Use Our Proven Process
Using the right tools to clean your car after a detail is very important but cleaning it in the right way will also take full benefit of your quality cleaning tools, make cleaning more efficient and also more effective. All in all, giving you more shine in less time!
Step 1) Clean The Wheels & Arches
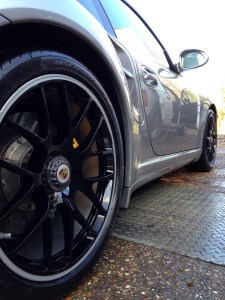 Starting with the wheels, tyres & arches separates the dirtiest parts of the car making the final hand wash an easier and more effective task. Use a bucket that is just used for the wheels, they are too dirty and full of metallic particles to make it safe to use the same water on the bodywork.
Rinse the wheels well to remove loose dirt and helps cool them if working on a warm day. At this point if your car has been recently detailed you should be able to use shampoo (at double strength) to clean the wheels and remove all dirt, but if you have driven for many miles or have a heavy vehicle you may need a dedicated wheel cleaner.
Use a separate wash mitt to clean the wheel and a decent wheel brush to clean the areas you can’t reach with your hands. Another brush to clean the arches really helps to make cleaning them quick and easy, without ruining your wash mitt.
Rinse the wheels one by one and leave them wet, as they will get wet again when washing the bodywork.
Step 2) Clean The Shuts
Using your main two buckets and wash mitt, rinse the shuts and apertures and wash them clean with your wash mitt.
They should be clean enough to not soil your wash mitt.
Rinse them but again, leave them wet.
NB: if we were performing a full detail we would clean these separately with degreasers and brushes.
Step 3) Main Wash
Now that your wheels & shuts are clean, its time for the main wash.
To avoid swirl marks or scratching your freshly polished paint, remove all loose dirt.
This can be done using a decent pressure washer which will be way more effective than a garden hose and don’t worry about it causing any damage..unless you’re using one designed to sand-blast and strip paint!
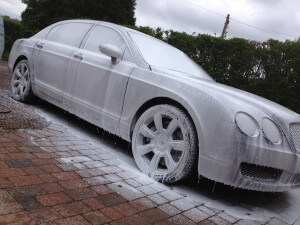
If there is still dirt evident on the paintwork, you can add a pre-wash solution in the form of a pre-wash using a pump sprayer (cheaper option) or through a snow foam lance with snow foam (more expensive but way more fun!).
Either method involves spraying the solution onto the vehicle, allowing it to dwell then rinsing the loosened dirt off at high pressure, resulting in a cleaner surface thus decreasing the chances of swirl marks.
Once the entire vehicle has been rinsed, it is time to wash.
Wash the vehicle from top to bottom using your wash mitt and the two bucket method.
The two bucket method offers a safer clean by simply adding a second bucket of just plain water. These two buckets with grit guards are ideal for making your wash swirl-free!
The idea is to wash the vehicle in small sections, cleaning out the mitt before picking up more shampoo, hopefully leaving the shampoo bucket spotless even by the end of the wash and even after dirty areas.
The rinse bucket is probably quite dirty which just shows what would of been in your shampoo bucket and the culprit of why your paint would otherwise be scratched!
Just take your time and even work in a spiral working down to the bottom or wash one side at a time, rinsing your mitt out regularly.
Step 4) Dry Bodywork & Wheels
Now the vehicle is spotless and thoroughly cleaned, dry it using your microfibre drying towel.
Once again it is important to always use the proper tools and a microfibre drying towel will not only make drying very quick but also helps decrease the chances of swirl marks.
Start by drying the windows, bodywork, shuts then wheels with a separate towel.
This leaves the potentially dirty areas until last and also helps avoid water spots in case its a warm day and things are drying quickly!
NB: Every time you touch the paint you risk scratching it hence the importance for soft towels! And never use towels that touch your wheels on your paint!
Step 5) Use Quick Detailer
 Now that your vehicle is clean & dry, use a quick detailer with a soft microfibre towel to refresh the just-waxed shine and also to wipe up any missed bits and remove any water spots.
This quick detailer can be used on all surfaces so follow the drying order and buff up the glass, bodywork, shuts and wheels.
If you have had a ceramic coating applied to your car we recommend this detailer that boosts ceramic coatings.
This little step can make a BIG difference!
Not only does it help touch up missed areas but also adds protection helping dirt and water to slide off and make it easier to clean next time!
Step 6) Finishing touches
To finish your maintenance clean off, apply some rubber protectant to your tyres and seals, polish brightwork such as the exhaust and dress any unpainted trim using a trim protectant.
At this point you can vacuum the interior and wipe down all surfaces using a damp microfibre cloth.
Your car should now be looking fresh and ready for the road again and this process can be used again and again.
If followed correctly and you take care not to use dirty materials, gentle pressure and the right products there are few reasons why your car should be looking like new for months and years!
You may want to or think you need to add any additional steps but keeping your car looking like new should be a simple and easy task, just read the steps above and don’t let forums persuade you to believe otherwise!
If you have any other questions just get in touch 🙂